Prices on this page come from our price tracker, and each price is dated where it appears.
The short answer
Yes — for almost every beginner making espresso at home. Not because a scale makes the coffee taste better on its own, but because it is the only way to make the same shot twice. Espresso is a ratio: a weight of dry coffee in, a weight of liquid espresso out, pulled over a measured time. Neither number is visible without weighing, and without either number you are not adjusting anything — you are guessing and hoping. A scale is also the cheapest meaningful upgrade in home espresso: a basic 0.1 g scale costs less than a bag of good beans and does more for your consistency than a grinder upgrade. The honest exception is narrow: pods, a pressurized basket, or a super-automatic that controls the process for you — or a settled routine with one coffee that you are already happy with.
Key points
- Espresso is a ratio — dose in, yield out, against time. A scale measures the first two; a timer alone cannot.
- Start at 1:2: 18 g of coffee in, 36 g of espresso out, in about 25–30 seconds. It is a starting point, not a rule.
- Weighing the dose needs only 0.1 g resolution — a cheap scale genuinely works. Weighing the yield live on the drip tray needs four things: 0.1 g, fast response, a thin body, and water tolerance.
- A 1 g kitchen scale cannot tell 18.0 g from 18.9 g, and that difference shows in the cup.
- You can honestly skip a scale with pods, a pressurized basket, or a super-automatic — or when your routine is already consistent and you like the result.
Contents
The two numbers that matter: dose and yield
Every espresso recipe is built from two weights. Dose is the weight of dry, ground coffee in the basket. Yield is the weight of liquid espresso in the cup. The relationship between them — the brew ratio — is most of what determines how the shot tastes, along with the time it takes to get there. A common starting point is about 1:2: roughly double the weight out that you put in, pulled in 25 to 30 seconds — for a standard double basket, 18 g of coffee in and 36 g of espresso out. None of those numbers are rules — the right ones depend on your beans and your taste — but they give you a place to start and a language for describing what changed.
The usual objection is that a timer is enough. It is not, and the reason is drift. Beans lose density as they age, so a grinder set to run for a fixed time delivers a different weight in week three than it did in week one. All of that is invisible to a timer and obvious on a scale. Weigh the output, not the volume, too: crema makes a shot look fuller than it is, and the same volume can hold different amounts of liquid depending on how much foam is present.
Our dial-in guide walks through the whole recipe step by step — dose, yield, time, and what to change first when the shot tastes wrong. The scale is what makes that guide usable: every adjustment in it is a number, and a number you cannot measure is a number you cannot repeat.
What actually changes in the cup
The first thing a scale changes is repeatability. The shot you loved on Tuesday can be made again on Thursday, because you know it was 18 g in and 36 g out in 28 seconds — not “about a scoop, stopped when it looked right.” Without those numbers, a good shot is an accident you cannot reproduce and a bad shot is a mystery you cannot solve.
The second thing it changes is diagnosis. A scale is a diagnostic tool, not just a measuring one. When a shot tastes sour, the question is whether the dose was light, the yield was short, or the grind was coarse — and without weights you cannot separate those three causes, so you end up changing everything at random. Two shots that both ran 28 seconds can still have different yields if the grind or tamp varied slightly, and only a scale catches that.
The third change is subtler: it holds two variables still while you work on the rest. Beginners arrive at espresso with a dozen variables at once — grind size, dose, distribution, tamping, water temperature, machine behaviour — and a scale is most valuable exactly when you are learning, and again every time you switch beans. None of this means a scale fixes bad coffee: stale beans, the wrong grind, or bad water will still produce bad coffee — the scale just makes sure those are the variables, not measurement noise. It is a steering wheel, not the destination: once the flavour is right, stop chasing numbers.
The dose-vs-yield split: why cheap scales half-work
Here is the distinction most guides never make, and it decides how much you need to spend. Weighing dose and weighing yield are two different jobs.
Weighing dose happens on the counter, with the portafilter or a dosing cup sitting still. It needs exactly one thing: 0.1 g resolution. A cheap scale that reads to a tenth of a gram genuinely works for this job. There is no rush, no water, and no space constraint — you tare, you grind, you read the number.
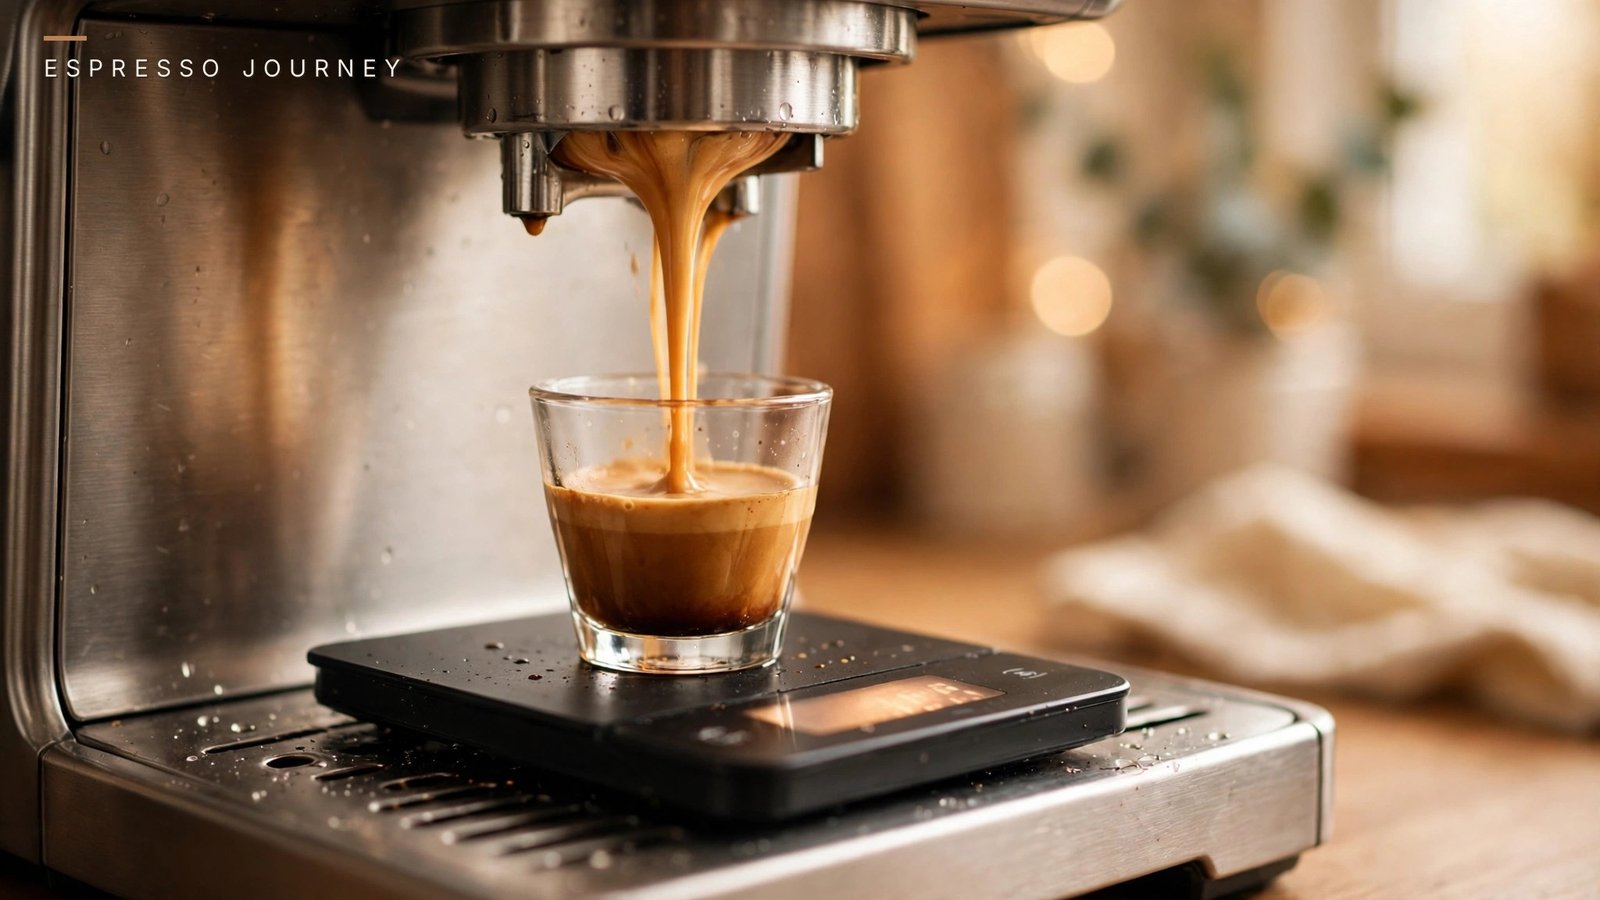
Weighing yield happens live, on the drip tray, under the spouts, with a cup on top and espresso arriving fast. It needs all four: 0.1 g resolution, a fast response so the reading keeps up with the pour, a thin body so scale plus cup still fit under the group head, and water tolerance, because it will get splashed. A slow scale lags behind the pour and you overshoot your target yield every time; a thick scale does not fit at all; an unsealed scale dies young.
That split is the honest reason cheap scales half-work. A basic 0.1 g scale is a real tool for dosing, and it is better than nothing for yield — but its limits show up quickly once you are weighing shots rather than flour. Start cheap if you like, weigh your dose properly from day one, and upgrade only when the live-yield step starts mattering to you.
Can I use a kitchen scale for espresso?
You can start with one, and it beats not weighing at all. But there are four differences that matter once you are weighing shots rather than flour, and most kitchen scales fail at least two of them.
| What matters | Kitchen scale | Espresso scale |
|---|---|---|
| Resolution | Usually 1 g steps — too coarse | 0.1 g as standard |
| Response speed | Slow to settle; lags the pour | Fast refresh, built to track a live pour |
| Size | Often too wide or tall for the tray | Sized to fit under the group head |
| Water tolerance | Not built for splashes | Sealed or water-resistant body |
| Timer | Rarely has one | Usually a built-in auto-start timer |
The resolution row is the one that decides it. A 1 g kitchen scale cannot distinguish an 18.0 g dose from an 18.9 g one, and that difference is noticeable in the cup — at a typical 18–20 g dose, a single gram is a meaningful percentage of the whole recipe. If your kitchen scale happens to read in 0.1 g steps and fits on your drip tray, use it happily. And if you are choosing between a scale with 0.1 g resolution and no timer, and a scale with a timer and 1 g resolution, take the resolution every time.
When you can honestly skip it
Not everyone needs a scale, and the guides that say “non-negotiable” without qualification are overselling. Here are the cases where the answer is genuinely no.
You brew with pods, a pressurized basket, or a super-automatic. These systems control most of the brewing variables for you: the dose is fixed, the pressure is managed, and the machine decides when the shot ends. A scale may still help with portioning, but it is not essential to enjoying the coffee. The same applies to a pressurized (dual-wall) basket — it forgives dose and grind variation by design, which is exactly what a scale exists to control.
Your routine is already consistent and you like the result. If you use the same coffee, the same basket, and the same routine every day, you may already have a reliable visual rhythm: dose with a consistent grinder setting, stop the shot when the stream changes, adjust only when the taste tells you to. If you are satisfied with your coffee and do not enjoy tracking variables, there is no requirement to add another step.
Your machine has almost no clearance. Some compact machines leave so little room between the drip tray and the group head that no scale plus cup fits underneath. In that case weigh your dose on the counter instead, and judge the yield by time and taste.
The important distinction is between not needing a scale and not wanting one. Both are legitimate. What is not legitimate is buying one simply because other baristas use one, then resenting the extra step. If you do not want to track variables, taste is the final judge regardless of the numbers.
If you buy one, check these five things
Shopping for a scale is simpler than shopping for a machine: five checks, in this order.
1. Resolution: 0.1 g, stated explicitly. Look for “0.1 g” in the specifications, not “precise” in the marketing. Most kitchen scales only list 1 g increments, which is not precise enough for espresso dosing.
2. Response speed. The reading should keep up with a pouring shot. Manufacturers rarely publish this, so check it in owner reviews: a scale that lags makes you overshoot your target yield every time.
3. Fit — measured, not guessed. Measure your drip tray’s width and depth, and the height between the tray and the spouts with your cup on the scale. The most common espresso-scale mistake is buying one that does not fit under the portafilter.
4. Water tolerance. It will get splashed. Look for a sealed or water-resistant body, and buttons placed where spray does not hit them — side buttons beat top buttons for exactly this reason.
5. A timer — nice, not first. An auto-start timer frees your hands. Take it if it comes with the first four; never trade resolution for it.
Price follows those five checks, not the other way around. A scale that passes all five at a low price is a better buy than a famous one that fails the fit check on your machine.
At a glance
Best for most beginners
Timemore Black Mirror Basic 2.0
Almost every beginner
0.1 g to 2 kg · auto-start timer · real-time flow-rate readout · USB-C · about 26 mm thick
When this guide was published (Nov 15, 2026): $55.00 at Amazon.
Check price on Amazon
Best for tight drip trays
Compact machines, low clearance, small trays
100 × 115 × 20 mm · 0.1 g / 2 kg · CNC aluminum · inclined display · side buttons
Same price as when this guide was published (Nov 15, 2026).
Check price on Timemore
The buy-once premium
Daily pullers buying once, for years
105 × 105 × 15 mm · 0.1 g (0.01 g mode) · water-resistant aluminum · flow-rate indicator · 30-plus-hour battery
Same price as when this guide was published (Nov 15, 2026).
Check price on Acaia
Prices are live from our price tracker and checked against the retailer’s listing; a rating appears only when it was verified the same day. Prices move — the button shows today’s number.
The three scales we track
Our flagship guide, Best Espresso Scale for Beginners, tests the full reasoning behind these picks. In short, these are the three we track — the value pick, the tight-tray pick, and the best on specification:
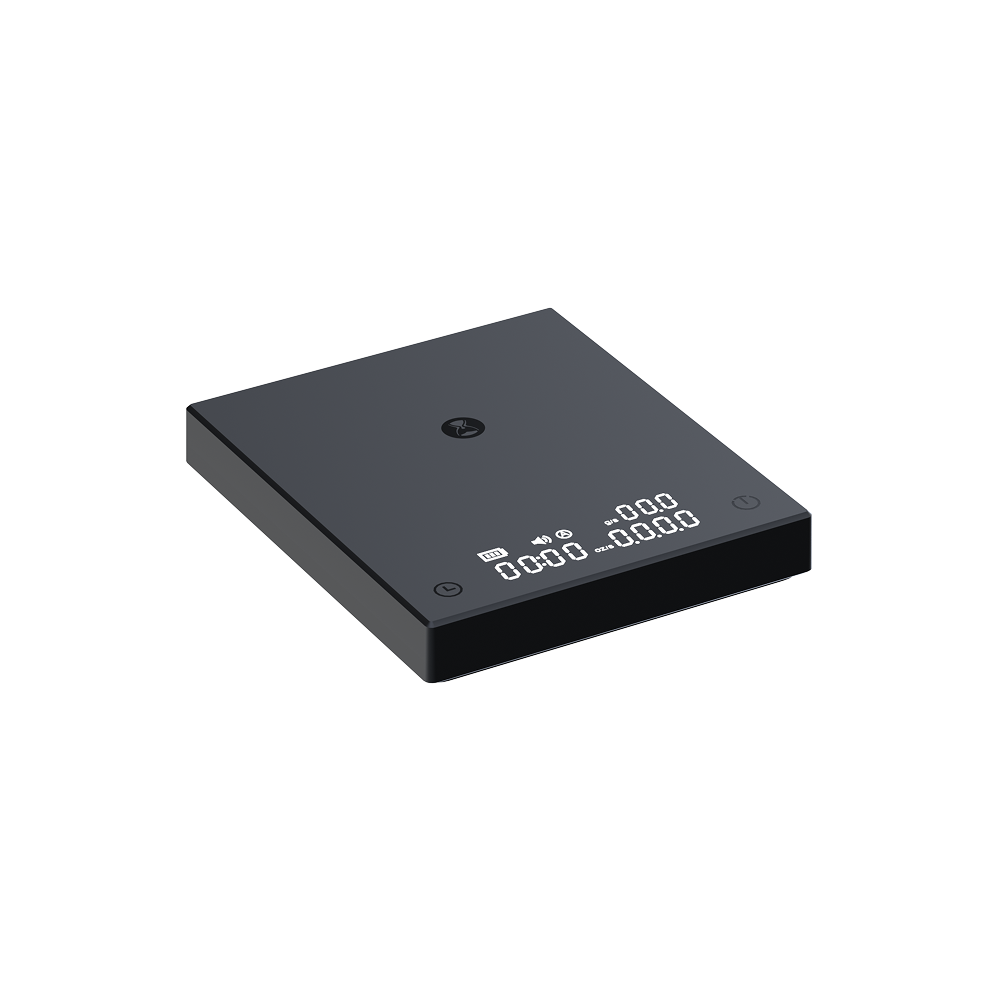
Timemore Black Mirror Basic 2.0
The scale most home bars should start with — and most never need to leave.
Key details
- 0.1 g resolution up to 2 kg
- Auto-start timer that begins when the first drops land
- Real-time flow-rate readout
- USB-C charging
- Big enough to weigh a portafilter directly
- Matte, splash-resistant top
- About 26 mm thick
What we like
- Covers the whole beginner checklist in one slab — 0.1 g, auto-timer and flow rate
- Big enough to weigh a portafilter directly, so dose-weighing is a one-step habit
- Matte top shrugs off splashes
Watch out for
- The thickest scale here at about 26 mm — on a machine with low spout clearance, pair it with a short espresso cup rather than a tall latte glass
- The charging port is not sealed — wipe it down rather than rinsing it, and don’t let it live in a puddle on the tray
When this guide was published (Nov 15, 2026): $55.00 at Amazon.

Timemore Black Mirror Nano
The espresso specialist of the Timemore family — a wedge that fits trays the Basic 2.0 crowds.
Key details
- 100 × 115 × 20 mm body
- 0.1 g resolution / 2 kg capacity
- CNC-machined aluminum body
- The most responsive scale Timemore sells
- Inclined display, readable mid-shot
- Buttons on the side, away from spray
- Flow-rate readout sharing the display with the timer
What we like
- Fits trays the Basic 2.0 crowds
- Inclined display is readable mid-shot without crouching
- Side buttons — a channeling spray hits nothing here
- CNC-machined aluminum body
Watch out for
- The small platform means dose-weighing happens in a cup or dosing vessel rather than a bare portafilter
- The flow-rate display shares space with the timer instead of getting its own screen
- It costs nearly double the Basic 2.0 for the same 0.1 g / 2 kg numbers — you are paying for fit and response
Same price as when this guide was published (Nov 15, 2026).

Acaia Lunar
The scale on café bars worldwide — a body built to be forgotten.
Key details
- 105 × 105 × 15 mm — the thinnest scale here
- 0.1 g resolution, with an optional 0.01 g high-readability mode
- Water-resistant anodized aluminum shell
- Two-year warranty that explicitly covers water damage
- Response is effectively instant
- Flow-rate indicator
- Battery runs 30-plus hours between USB-C charges
What we like
- The thinnest scale here, at 15 mm
- Water-resistant shell with a two-year warranty that covers water damage
- Effectively instant response, and the reference flow-rate indicator
- 30-plus hours of battery between charges
Watch out for
- You are paying for durability, thinness and speed — not for more accurate espresso: a Basic 2.0 makes the same 36 g stop
- Honest overkill for beginners still deciding whether espresso is their hobby
Same price as when this guide was published (Nov 15, 2026).
All three prices are live from our price tracker — the price shown is today’s, and a rating appears only when it was verified the same day.
How we chose what to recommend
This guide is research-based: we compared the live search results for this question, the manufacturers’ published specifications, and our own price tracker. We have not hands-on tested every scale on the market — the three above are the ones our flagship guide already tracks and verifies. Where a number comes from our tracker, the price line shows the store and the date it was checked.
Frequently asked questions
Do I really need a coffee scale for espresso?
If you want the same shot twice, yes. Espresso is a ratio of dry coffee in to liquid espresso out, and neither number is visible without weighing. Timing alone drifts: beans lose density as they age, so a grinder set to a fixed time delivers a different dose from week to week.
Can I use a regular kitchen scale for espresso?
You can start with one, and it beats not weighing at all — but only if it reads in 0.1 g steps. Most kitchen scales read in whole grams, too coarse for an 18 g dose, and are usually too slow, too big, and too exposed to water for live yield weighing.
What resolution should a coffee scale have?
0.1 g. A 1 g kitchen scale cannot distinguish an 18.0 g dose from an 18.9 g one, and that difference is noticeable in the cup.
Do I need a scale with a timer for espresso?
It helps: an automatic timer starts with the shot, so weight and time are measured together. But resolution comes first — take 0.1 g without a timer over a timer with 1 g resolution.
What is dose vs yield, and which do I weigh when?
Dose is the dry coffee in the basket — weigh it on the counter before you brew. Yield is the liquid espresso in the cup — weigh it live on the drip tray while the shot pulls. Start at 1:2, 18 g in and 36 g out in about 25–30 seconds.
Can I skip the scale if I use pods or a pressurized basket?
Yes. Pods, pressurized baskets, and super-automatics control most brewing variables for you, so a scale adds little you will use. The same holds if your routine is already consistent and you are happy with the cup.
Will a cheap scale work for espresso?
For dosing, yes — any scale that reads to 0.1 g works on the counter. For live yield weighing it usually falls short: too slow, too thick, or unsealed against splashes.
What if my machine has no room for a scale under the group head?
Measure first: tray width and depth, and the height to the spouts with your cup on the scale. If nothing fits, weigh your dose on the counter and judge yield by time and taste.
Sources
The claims in this article come from the sources that publish them: DipacCi USA’s espresso-scale guide, BrewUncut’s “Do You Really Need an Espresso Scale?”, Ember-Cole’s “Do You Really Need a Coffee Scale?”, Crema and Grind’s “The Best Coffee Scales for Espresso (2026)”, Podium Coffee Club’s “Brewing by Weight”, and Espresso Guidebook’s “Do You Need a Coffee Scale for Espresso?” — all read on 15 November 2026 — plus the manufacturers’ published specifications and our own price tracker. The 1:2 starting ratio and the 25–30 second window are the consensus across those sources and match our own dial-in guide.