Prices on this page come from our price tracker, and each price is dated where it appears.
Here is the short answer. Once you own an espresso machine and a capable burr grinder, the rest of a home espresso setup is smaller than the internet makes it look: four tools you will use on every shot from day one (about $136 to $176 in total), three cheap upgrades worth adding in your first month (about $71), and a long list of popular gear that can wait or be skipped entirely. Start by opening the box your machine came in, because two of the “essentials” on most shopping lists may already be sitting in it.
This guide assumes the machine and grinder are already chosen. If they are not, start with our guide to the best beginner espresso machines under $500 and the matching beginner grinder guide — then come back here for everything that goes around them.
First, check what is already in the box
Most beginner machines ship with more than the product photos suggest. The Breville Bambino, for example, includes single and dual wall filter baskets, a portafilter, a milk jug, a tamper and descaling powder. De’Longhi and Gaggia bundles are similar in spirit: a starter tamper and at least basic baskets are almost always in there.
Two of those included items matter for your shopping list. The included milk jug is genuinely fine to learn with, so a pitcher upgrade can wait. The included tamper is the weak link: it is usually light, sometimes plastic, and often slightly undersized for the basket, which leaves a ring of uncompressed coffee at the edge. That is why a real tamper appears on the day-one list below while a pitcher is marked optional. Fresh beans are the other day-one purchase no list should skip — budget for a bag roasted within the last few weeks, ideally from a local roaster, before you budget for any gadget.
Contents
At a glance
Day one
The one accessory to buy first, if you can only afford one
0.1 g resolution to 2 kg · shot timer with auto-start · flow-rate readout · USB-C rechargeable
When this guide was published (Nov 6, 2026): $55.00 at Timemore.
Check price on Amazon
Day one
Even, repeatable tamping, sized to your basket
Spring-loaded, 15 / 25 / 30 lb springs · self-leveling plate · 51 / 53.3 / 58.5 mm sizes · stand included
Same price as when this guide was published (Nov 6, 2026).
Check price on Amazon
Day one
Clean puck disposal after every shot
Holds ten pucks · removable knock bar · about 4.4 × 4.8 inches
Same price as when this guide was published (Nov 6, 2026).
Check price on Amazon
Day one — milk drinkers only
Pourable microfoam for lattes and cappuccinos
12 oz · bell-shaped body · sharp spout · measurement marks inside
Same price as when this guide was published (Nov 6, 2026).
Check price on Amazon
Month one
Cutting channeling and shot-to-shot variation
Nine 0.25 mm and nine 0.3 mm needles · counter stand included
When this guide was published (Nov 6, 2026): $29.99 at Amazon.
Check price on Amazon
Month one
Normcore Magnetic Dosing Funnel V2
Keeping grounds in the basket while you dose and do WDT
Anodized aluminum · eight magnets · 51 / 54 / 58 mm sizes
When this guide was published (Nov 6, 2026): $25.99.
Check price on Amazon
Month one
A cleaner shower screen and drier pucks
0.8 mm 316 stainless steel · 51 / 53.3 / 58.5 mm sizes
When this guide was published (Nov 6, 2026): $14.99.
Check price on Amazon
Get the free Beginner Espresso Setup Checklist
The setup checklist plus a printable dial-in worksheet — what you actually need on day one, what can wait, and a shot log for your first bag. Join the list and it lands in your inbox.
One practical espresso email now and then. No spam, no selling your address, unsubscribe anytime.
Prices are live from our price tracker and checked against the retailer’s listing; a rating appears only when it was verified the same day. Prices move — the button shows today’s number.
Day one: four tools you will use on every shot
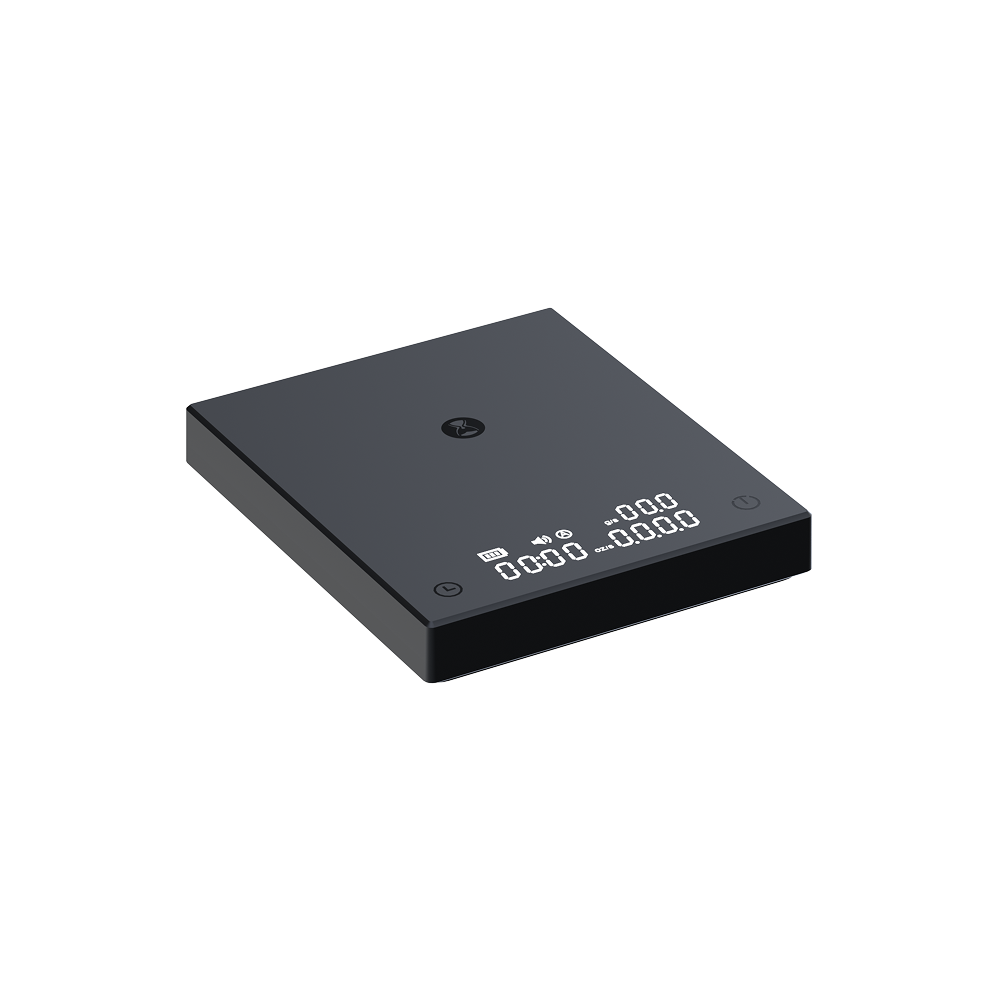
Timemore Basic 2.0
A 0.1 g scale with a timer — the scale most beginner setups land on.
Key details
- 0.1 g resolution up to 2 kg
- Built-in shot timer with an auto-start mode
- Flow-rate readout
- USB-C rechargeable battery
- Slim body, about 6 × 5.1 inches — fits on a Bambino-sized drip tray
What we like
- Reads to 0.1 g and reacts fast enough to stop a shot on target
- If you can only afford one accessory, this is the one
- Every other tool works better once your dose and yield are consistent
When this guide was published (Nov 6, 2026): $55.00 at Timemore.
Espresso is dosed by weight, not by scoops. The standard beginner recipe — 18 grams of coffee in, 36 grams of espresso out, in roughly 25 to 30 seconds — is impossible to repeat if you cannot weigh both ends of it. Your kitchen scale probably reads in whole grams and updates slowly; an espresso scale reads to 0.1 g and reacts fast enough to stop a shot on target.
The Timemore Basic 2.0 is the scale most beginner setups land on: 0.1 g resolution up to 2 kg, a built-in shot timer with an auto-start mode, a flow-rate readout, and a USB-C rechargeable battery, in a slim body (about 6 × 5.1 inches) that fits on a Bambino-sized drip tray. It costs $55 in black at Timemore (list price $59), checked November 6, 2026. If you can only afford one accessory, this is the one — every other tool in this guide works better once your dose and yield are consistent. Our guide to how to dial in espresso shows the weighing routine step by step.
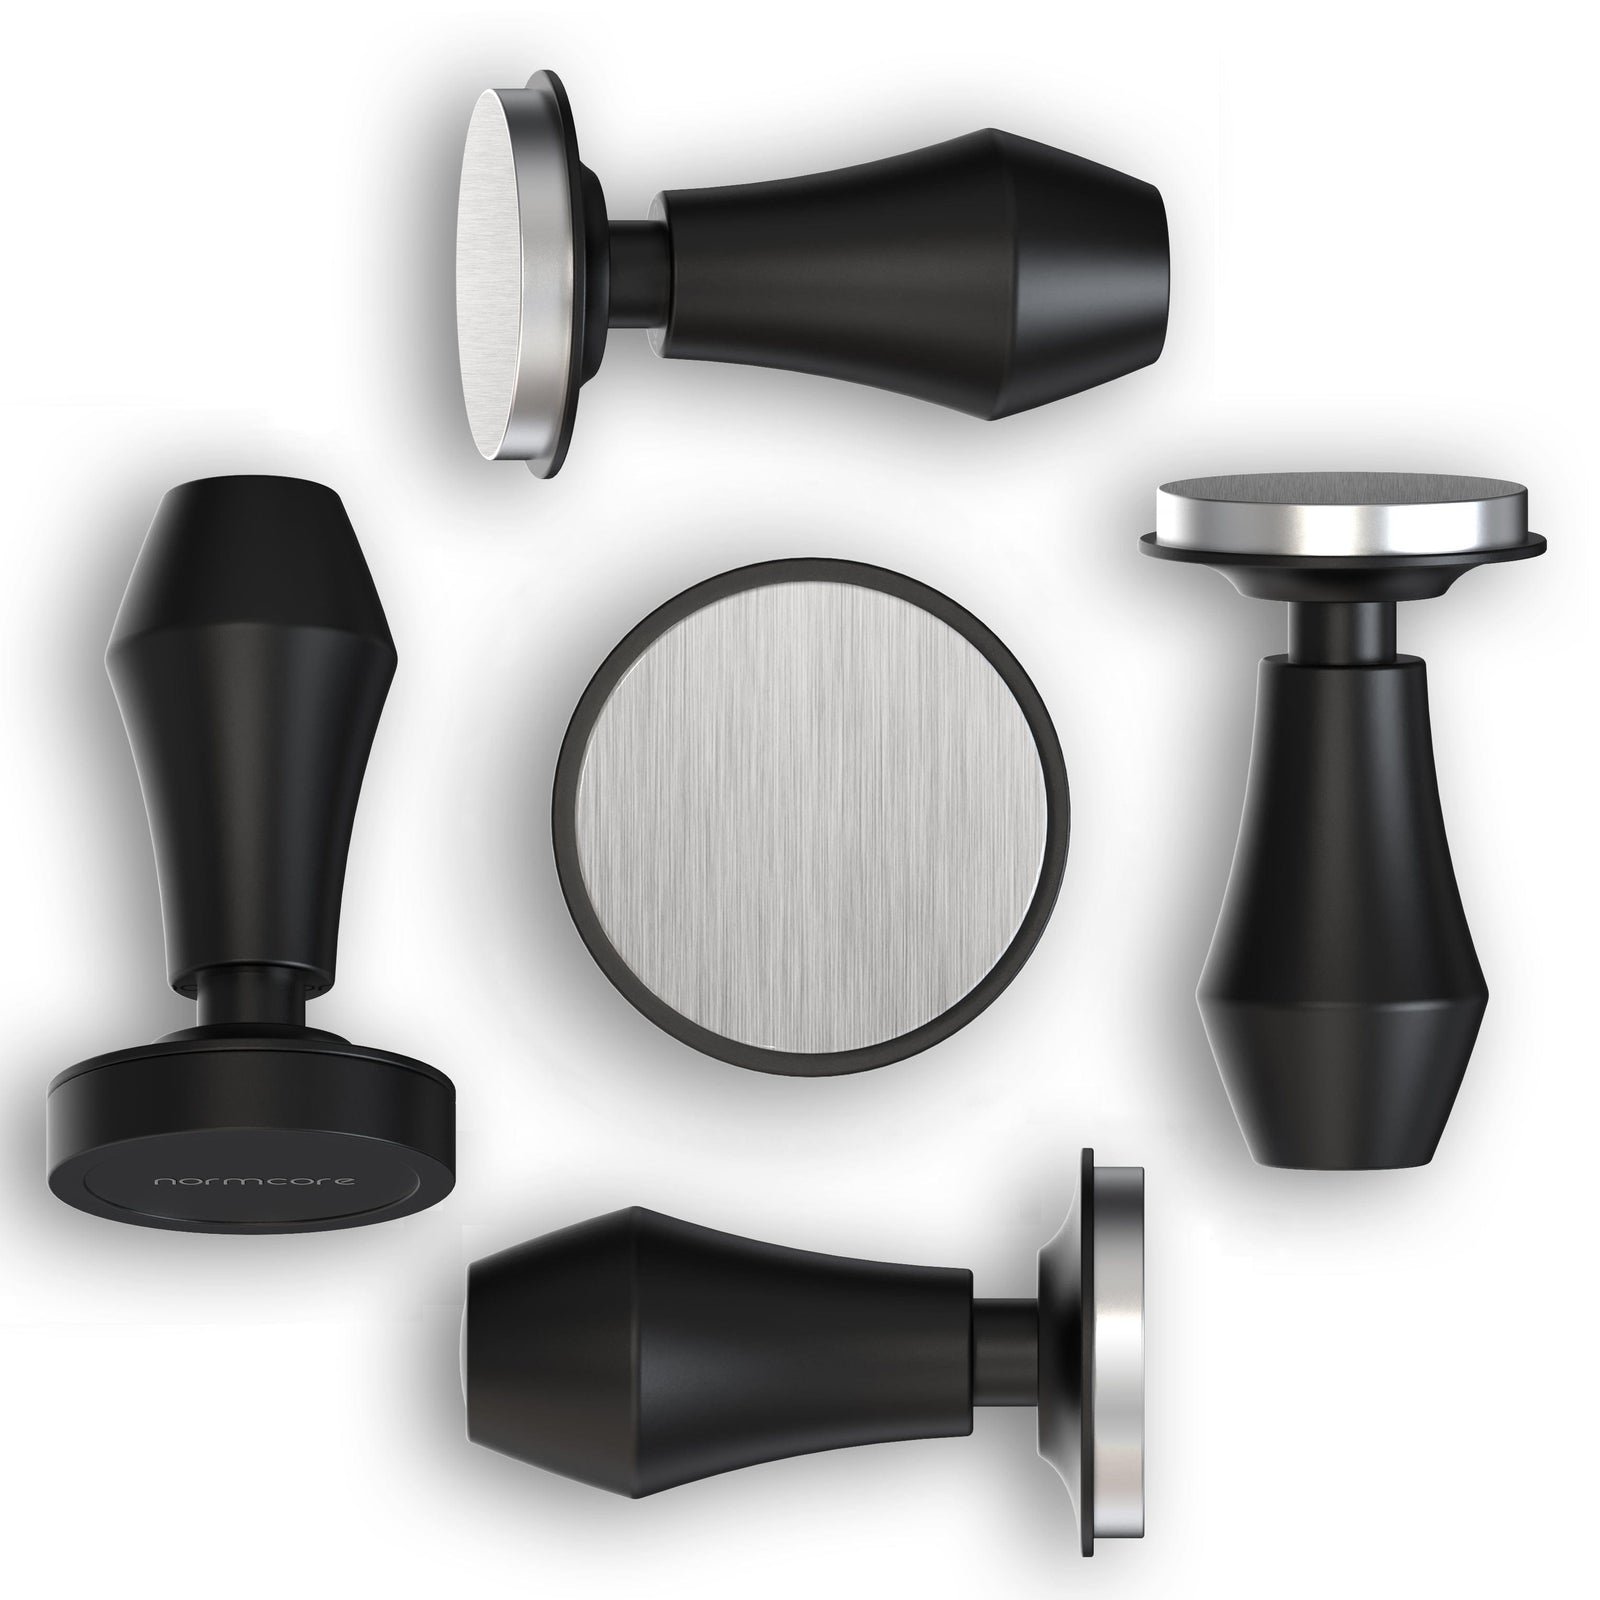
Normcore V4
A real tamper, sized to your basket — the easy recommendation.
Key details
- Interchangeable 15, 25 and 30 lb springs
- Self-leveling plate keeps the base flat
- Stand included in the box
- Every basket size: 51 mm, 53.3 mm and 58.5 mm
What we like
- The spring clicks at a set pressure, so your tamp stops being a variable
- Compresses the coffee evenly, at the same pressure, every time
Watch out for
- Get the size right before you buy — this is where beginners most often waste money
- A tamper even slightly too small leaves an uncompressed ring that channels
Same price as when this guide was published (Nov 6, 2026).
Tamping has one job: compress the coffee evenly, at the same pressure, every time. A spring-loaded tamper removes the guesswork — the spring clicks at a set pressure and a leveling plate keeps the base flat, so your tamp stops being a variable. Before you buy any tamper, get the size right, because this is where beginners most often waste money:
| Your machine family | Basket size | Tamper size to buy |
|---|---|---|
| De’Longhi (Dedica, La Specialista) | 51 mm | 51 mm |
| Breville / Sage (Bambino, Barista Express) | 54 mm | 53.3 mm |
| Gaggia Classic and most prosumer machines | 58 mm | 58.5 mm |
The Normcore V4 is the easy recommendation: interchangeable 15, 25 and 30 lb springs, a self-leveling plate, a stand in the box, and every size in the table above. It costs $46.99 (list $49.99) at Normcore, checked November 6, 2026 — the same price Amazon showed this week.
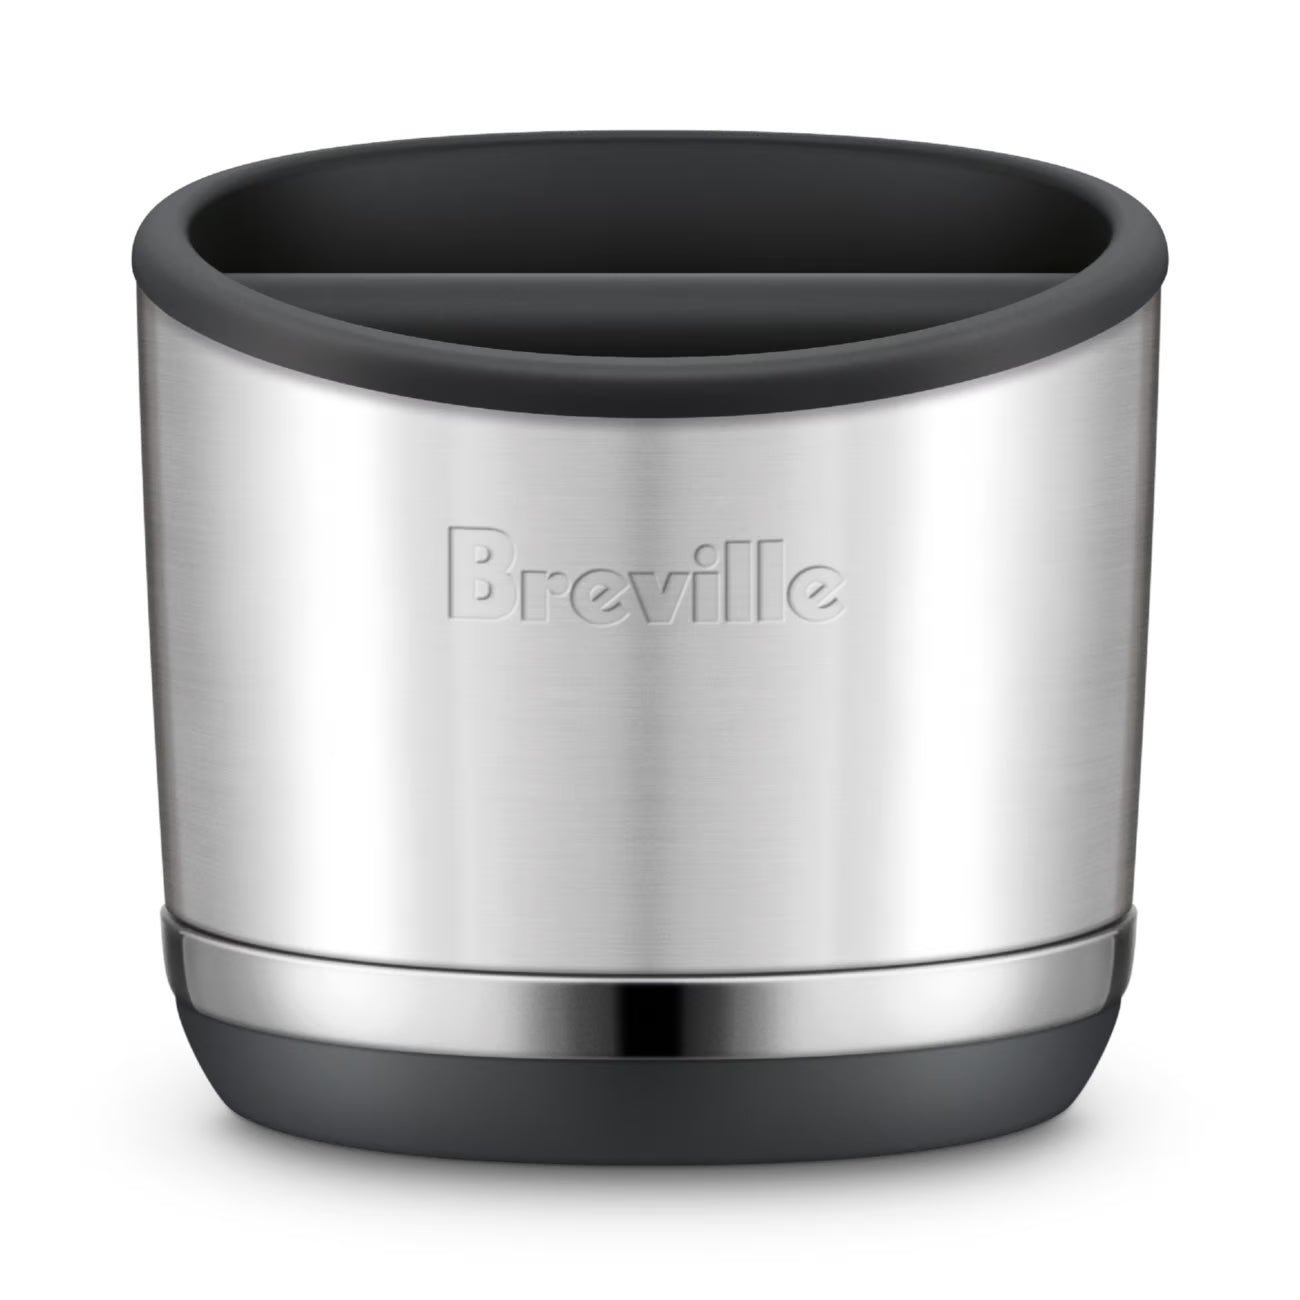
Breville Knock Box 10
The least glamorous item in this guide — and the one you will be glad about every single morning.
Key details
- Holds ten pucks
- Removable knock bar for rinsing
- Compact, about 4.4 × 4.8 inches
- Sits on a Breville drip tray for storage
What we like
- One firm tap on the padded bar and the puck drops in
- Holds several days of pucks before it needs emptying
Same price as when this guide was published (Nov 6, 2026).
After every shot, the spent puck has to go somewhere. Knocking it out on the edge of a trash can works until you chip a portafilter or fling wet grounds across the kitchen. A knock box is a small bin with a padded bar across the top: one firm tap and the puck drops in, and the box holds several days of pucks before it needs emptying.
The Breville Knock Box 10 holds ten pucks, has a removable knock bar for rinsing, and is compact enough (about 4.4 × 4.8 inches) to sit on a Breville drip tray for storage. It costs $33.95 at Best Buy and Whole Latte Love, checked November 6, 2026. It is the least glamorous item in this guide and the one you will be glad about every single morning.

Fellow Eddy
A milk pitcher, if you drink milk drinks — the beginner-friendly pick.
Key details
- 12 oz size suits one or two milk drinks
- Bell-shaped body keeps milk rolling while you steam
- Sharp spout for controlled pours
- Measurement marks inside
- 18 oz version only worth it for back-to-back large lattes
What we like
- A proper spout is what turns steamed milk into pourable microfoam
- Beginner-friendly pick for lattes and cappuccinos
Watch out for
- Skip it entirely for straight espresso or americanos — you need no pitcher at all
- If your machine included a jug, learn on that first and upgrade when you start attempting latte art
Same price as when this guide was published (Nov 6, 2026).
If your drinks are straight espresso or americanos, skip this section — you need no pitcher at all. If you make lattes and cappuccinos, a pitcher with a proper spout is what turns steamed milk into pourable microfoam. The exception from the box-check above applies: if your machine included a jug, learn on that first and upgrade when you start attempting latte art.
When you do upgrade, the Fellow Eddy (12 oz) is the beginner-friendly pick: a bell-shaped body that keeps milk rolling while you steam, a sharp spout for controlled pours, and measurement marks inside. The 12 oz size suits one or two milk drinks; the 18 oz is only worth it for back-to-back large lattes. It costs $39.95, checked November 6, 2026 — the version pictured is Graphite. Put it to work with our classic caffe latte recipe.
Month one: three cheap consistency upgrades
Buy these once you have pulled a few dozen shots and know your routine. Each one fixes a specific annoyance you will have felt by then, and together they cost about $71.
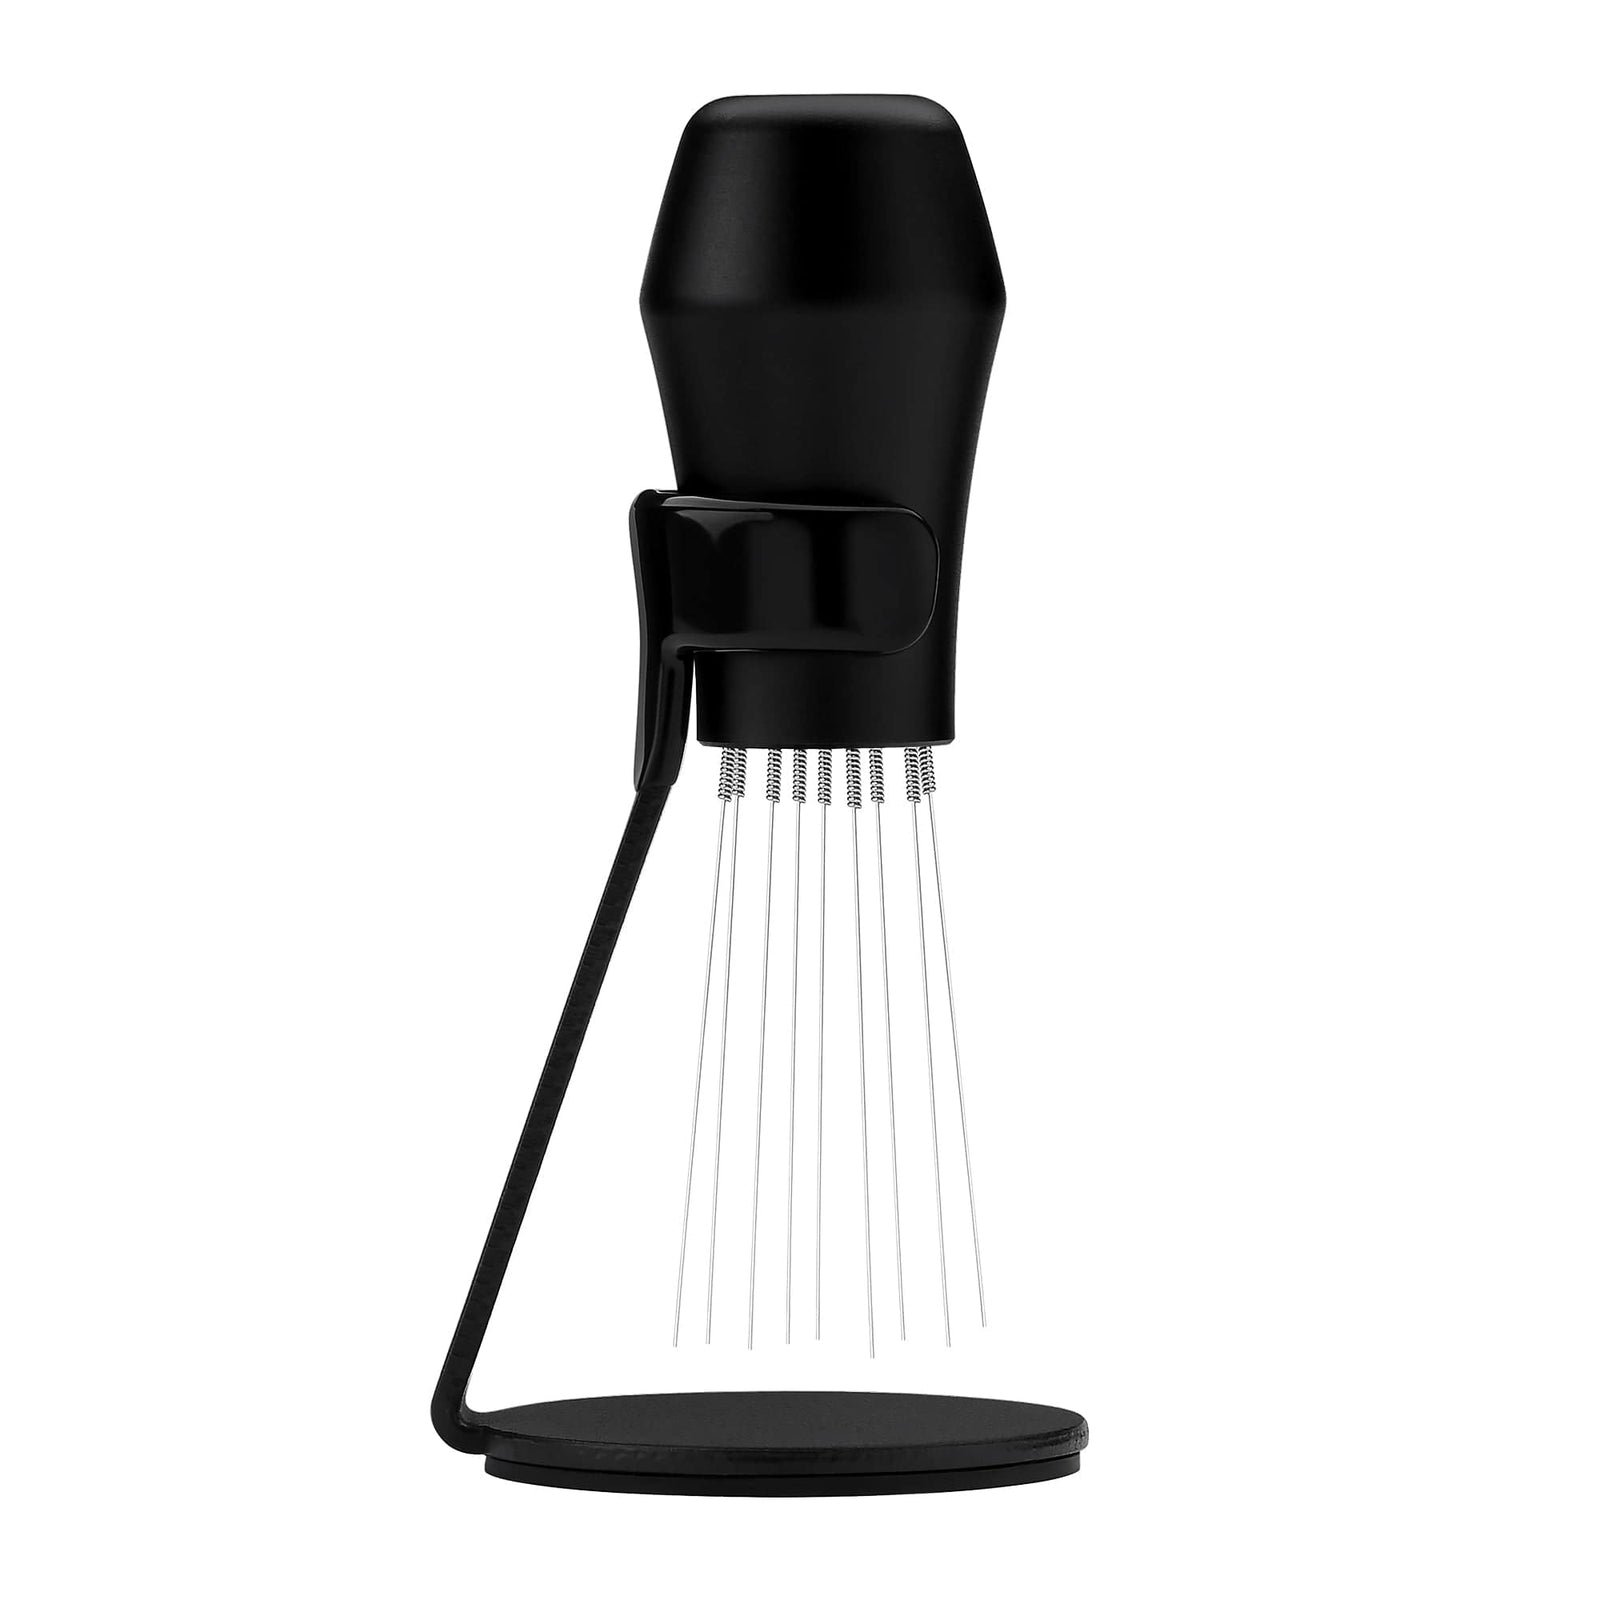
Normcore WDT V3
A WDT tool — repeatedly described as the cheapest consistency upgrade in espresso.
Key details
- Nine 0.25 mm and nine 0.3 mm needles
- Counter stand included
- Stirs the grounds for a few seconds before tamping, breaking clumps and leveling the bed
What we like
- Breaks up the clumps that are the main cause of channeling
- The cheapest consistency upgrade in espresso — and it earns that reputation
Watch out for
- A month-one buy, not day one — pull a few dozen shots and learn the basic routine first
When this guide was published (Nov 6, 2026): $29.99 at Amazon.
Ground coffee leaves the grinder in clumps, and clumps are the main cause of channeling — water punching through weak spots instead of extracting evenly. A WDT (Weiss Distribution Technique) tool is a handle with fine needles that stirs the grounds for a few seconds before tamping, breaking clumps and leveling the bed. It is repeatedly described as the cheapest consistency upgrade in espresso, and it earns that reputation.
The Normcore WDT V3 ships with nine 0.25 mm and nine 0.3 mm needles plus a counter stand. It costs $34.99 to $36.99 depending on finish at Normcore, and was $29.99 on Amazon, checked November 6, 2026. If your shots spray or run unevenly, read what channeling is and how to fix it alongside.

Normcore Magnetic Dosing Funnel V2
A dosing funnel — the ring that keeps grounds in the portafilter while you dose and do WDT.
Key details
- Anodized aluminum
- Eight magnets snap it onto the basket
- 51, 54 and 58 mm sizes
- Extends the basket’s walls, so grounds stay in the portafilter instead of dusting your counter
What we like
- Keeps WDT stirring tidy — the funnel is what keeps the stirring contained
- Usually bought together with a WDT tool; the two work as a pair
Watch out for
- On a Barista Express, the 54 mm funnel cannot be used while the portafilter sits in the built-in grinder fork — dose into a cup or use a standalone grinder station
When this guide was published (Nov 6, 2026): $25.99.
A dosing funnel is a short ring that sits on the basket and extends its walls, so grounds stay in the portafilter while you dose and do WDT instead of dusting your counter. Once you add a WDT tool to your routine, the funnel is what keeps the stirring tidy — the two are usually bought together. Normcore’s V2 is anodized aluminum with eight magnets that snap it onto the basket, in 51, 54 and 58 mm sizes, for $25.99 (list $39.99), checked November 6, 2026.
One honest caveat, straight from Normcore: on a Barista Express, the 54 mm funnel cannot be used while the portafilter sits in the machine’s built-in grinder fork. Dose into a cup or use a standalone grinder station and it works normally.

Normcore Ultra-Slim
A puck screen — buy it for consistency and cleanliness, not miracles.
Key details
- 0.8 mm of 316 stainless steel
- Thin enough to fit tight headspaces
- 51, 53.3 and 58.5 mm sizes
- Sits on top of the tamped coffee
What we like
- Spreads the water from the group head more evenly
- Keeps coffee fines off the shower screen — the machine stays cleaner and pucks knock out drier
Watch out for
- The effect on taste is modest
When this guide was published (Nov 6, 2026): $14.99.
A puck screen is a thin metal disc that sits on top of the tamped coffee. It spreads the water arriving from the group head more evenly and — the benefit you will notice most — keeps coffee fines off the shower screen, so the machine stays cleaner and pucks knock out drier. The effect on taste is modest; buy it for consistency and cleanliness, not miracles.
The Normcore Ultra-Slim is 0.8 mm of 316 stainless steel, thin enough to fit tight headspaces, in 51, 53.3 and 58.5 mm sizes. It costs $14.99 (list $39.99), checked November 6, 2026. Finish the month-one kit with any silicone tamping mat (about $10) to protect your counter and give the portafilter a stable base.
What can wait — and what to skip entirely
- Bottomless (naked) portafilter. A diagnostic tool that shows you channeling, not a fix for it. Useful and fun later; it will only make a mess while you are learning.
- Distributor / leveler tool. It smooths the surface of the bed but does not distribute the coffee beneath it. A WDT tool does the real job for less money.
- Precision baskets. Aftermarket baskets reward a very good grinder and established technique. The stock basket is not what is holding a beginner back.
- A separate electric milk frother. Your machine has a steam wand. A frother adds a countertop appliance that produces stiffer foam and one more thing to wash.
- Smart or Bluetooth scales. App logging is a hobby upgrade. A fast, accurate 0.1 g scale with a timer covers everything a beginner needs.
- Expensive beans while learning. You will sink a lot of shots in your first weeks. Learn on fresh, decent beans and save the pricey single origins for when your shots are repeatable.
What the whole setup actually costs
Here is the full accessories bill for the picks above, at prices checked on November 6, 2026:
| Tool | When to buy | Price |
|---|---|---|
| Timemore Basic 2.0 scale | Day one | $55 |
| Normcore V4 tamper | Day one | $46.99 |
| Breville Knock Box 10 | Day one | $33.95 |
| Fellow Eddy pitcher 12 oz | Day one, milk drinkers only | $39.95 |
| Normcore WDT tool V3 | Month one | $29.99 |
| Normcore dosing funnel V2 | Month one | $25.99 |
| Normcore Ultra-Slim puck screen | Month one | $14.99 |
| Day-one total | $135.94 ($175.89 with pitcher) | |
| Everything on this page | about $247 |
Put it in context: a Bambino at $299.95 plus a capable beginner grinder at about $200 plus the day-one tools above totals roughly $676 — a complete, no-compromises starter setup for well under the $1,000 that bundle lists often imply. Spend the savings on fresh beans.
Shopping today? Our price tracker checks the products in this guide twice a day against the retailers’ own listings. See which ones are actually on sale right now on our espresso deals page — every price verified, and a deal whose price climbs back up comes straight down.
Frequently asked questions
What do I actually need for a home espresso setup?
Beyond the machine and a burr grinder: a 0.1 g scale with a timer, a tamper that fits your basket, a knock box, fresh beans, and a milk pitcher if you make milk drinks and your machine did not include one. Everything else is an upgrade, not a requirement.
How much does a complete home espresso setup cost?
A realistic complete setup runs about $675: roughly $300 for a beginner machine like the Bambino, about $200 for a capable burr grinder, and $136 to $176 for day-one tools. Cheaper setups exist, but below that level the grinder usually becomes the limiting factor.
How much should I budget for accessories alone?
Budget $136 to $176 for day one (scale, tamper, knock box, and a pitcher if needed). The full list in this guide, including the month-one consistency upgrades, totals about $247 at prices checked in November 2026.
What size tamper do I need?
Match the tamper to your basket: 51 mm for De’Longhi machines, 53.3 mm for Breville and Sage 54 mm baskets, and 58.5 mm for 58 mm machines like the Gaggia Classic. A tamper even slightly too small leaves an uncompressed ring that channels.
If I can only buy one accessory, which comes first?
The scale. Weighing your dose and your yield (18 g in, 36 g out) is what turns random shots into repeatable ones, and it makes every later upgrade — tamper, WDT, grinder changes — measurable instead of guesswork.
Is a WDT tool worth it for a beginner?
Yes, but in month one, not on day one. Learn the basic routine first; once you can pull a repeatable shot, a WDT tool (about $30) is the cheapest way to cut down channeling and shot-to-shot variation.
Do I need a milk pitcher if my machine came with one?
No. Included jugs, like the one Breville bundles with the Bambino, are fine for learning to steam. Upgrade to a pitcher with a sharper spout when you start pouring latte art and the jug, not your technique, becomes the limit.
Do I need a bottomless portafilter?
No. A bottomless portafilter only shows you problems like channeling; it does not fix them, and it sprays while you are learning. It is a enjoyable diagnostic later, once your puck prep is consistent.
Which espresso accessories are a waste of money?
For a beginner: a distributor used instead of a WDT tool, a separate electric frother when your machine has a steam wand, app-connected smart scales, and precision baskets bought before your grinder and technique can use them.
The bottom line
A home espresso setup is a machine, a grinder, and a surprisingly short list of tools: scale, tamper, knock box, pitcher if you steam milk — about $136 to $176 on day one, another $71 in month one, and nothing else until your habits, not your gear, are the limiting factor. Buy in that order, size everything to your basket, and put the money you did not spend into fresh beans.
Get the free Beginner Espresso Setup Checklist
The setup checklist plus a printable dial-in worksheet — what you actually need on day one, what can wait, and a shot log for your first bag. Join the list and it lands in your inbox.
One practical espresso email now and then. No spam, no selling your address, unsubscribe anytime.