Last updated: November 5, 2026.
The short answer
The biggest beginner mistake is not on most lists: expecting café-level espresso from the first bag, with no dialing in. Espresso does not work that way — every new bag of beans needs a few shots of adjustment before it tastes right, and even experienced home baristas plan on roughly three to five shots to land a new coffee. Treat those first shots as tuition, not failure. The ten mistakes below are the specific, fixable ones hiding underneath that expectation — ranked by how much damage each does in your first month, each with the symptom it causes and the one fix that matters. Work through them in order and most bad shots explain themselves.
Contents
First, the mistake behind the mistakes
Here is the scene almost every beginner lives through. The machine arrives, the first bag goes in, and the shots are sour, bitter, or just thin. The conclusion feels obvious: the machine is bad, or espresso at home does not work. So the machine goes back, or into a cupboard.
What actually happened is simpler. Dialing in — adjusting grind, dose and ratio until a specific bag of beans tastes balanced — is not an advanced skill bolted onto espresso. It is espresso. A café barista does it every morning and every time the beans change; a home beginner needs about a week of daily shots before the routine feels natural. The full dial-in loop has its own guide on this site. This page is the companion: the ten ways beginners sabotage that loop, usually without knowing a loop exists.
1. Starting with stale or pre-ground coffee — and blaming the machine
Coffee is the ingredient; everything else is plumbing. Beans with no roast date — the default supermarket bag — are usually weeks or months old, and old beans extract flat and sour no matter what the machine does. Pre-ground goes further: it loses its aroma in hours rather than weeks, and its grind size is fixed at whatever the pack says, so the one adjustment espresso depends on is taken away before you start. Pre-ground in the pressurized basket your machine shipped with is a legitimate way to begin; expecting café results from it is the mistake.
How you’d notice: shots taste flat and much the same whatever you change, with little or no crema on a single-wall basket — or fast, pale gushers if you try pre-ground in that basket.
The fix: buy whole beans with a roast date on the bag and use them roughly one to four weeks after roasting (a working window, not a law), grinding right before the shot. That means an espresso-capable grinder — our grinder guide covers what qualifies and what it costs.
2. Not using a scale
Beginners dose by scoop and stop the shot by eye, then wonder why the recipe never repeats. It cannot repeat: neither of its numbers was ever measured. A scoop varies by grams from day to day, and judging yield by volume is worse — crema makes volume lie, and the same-looking shot can hide very different amounts of liquid. A swing of a gram or two in dose visibly changes how a shot runs, so unmeasured inputs guarantee inconsistent outputs.
How you’d notice: the “same” recipe produces a different shot every day, and a genuinely good shot can never be made twice.
The fix: a basic 0.1 g kitchen scale, used twice per shot — weigh the dose going in and the yield coming out, starting at twice the dose’s weight (the dial-in guide’s recipe card shows the full starting point). It is the cheapest upgrade in this entire article.
3. Changing several variables at once
The shot is sour, so you grind finer, add a gram, and let it run longer — all before the next pull. The next shot is different, but you have learned nothing: any of the three changes (or two fighting each other) could be responsible. This process mistake turns every other mistake on this list into a permanent condition, because with no controlled changes there is no way to find out what worked.
How you’d notice: shots get better or worse and you cannot say why; your settings wander week to week and never settle anywhere.
The fix: one change, one shot, one line in a log — grind setting, dose, yield, time, a few words on taste. The dial-in loop gives those single changes a sensible order.
4. Filling the basket wrong
Baskets are built for a rated amount of coffee — usually stamped on the side — and the dose should live within a gram or two of it. Too little coffee leaves a gap under the shower screen; water pools there, disrupts the surface, and rushes through — a recipe for channeling. Too much means the puck is pressed into the screen as you lock in, cracking the surface and baking grounds onto the group.
How you’d notice: too little — a muddy, wet puck after a fast, spurting shot. Too much — an imprint of the shower screen (or its screw) in the dry puck before brewing, a choked start, and grounds stuck to the group head.
The fix: dose to your basket’s rating, give or take a gram or two, and keep it there while you adjust other things — dose is the foundation the whole dial-in recipe is built on. For the full picture of what excess headspace does to a shot, see the channeling explainer.
5. Tamping straight onto a mound — skipping puck prep
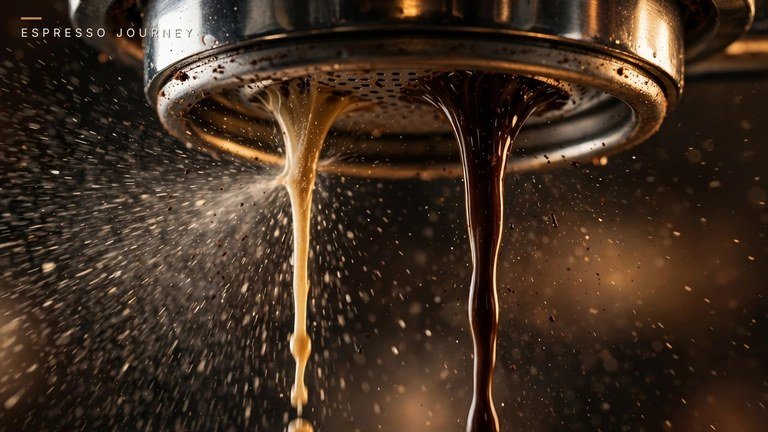
Grounds land in the basket in a mound, with clumps. Tamp straight down on that and you lock the unevenness in: dense spots and loose spots, side by side. Water is lazy — it races through the loose paths while the dense areas barely extract. Tamping at a slight angle creates the same problem in miniature. The taste signature is unmistakable: sour and bitter in the same sip, because part of the puck under-extracted while another part over-extracted. That combination has a name — channeling — and its fix is preparation, not grind.
One warning about advice you will meet elsewhere: you may be told to tamp with a specific number of pounds of pressure. No verified number exists — the figures quoted in different guides do not even agree with each other. What matters is a tamp that is level and the same every time.
How you’d notice: sour and bitter together; shot times that swing at identical settings; holes or cracks in the spent puck.
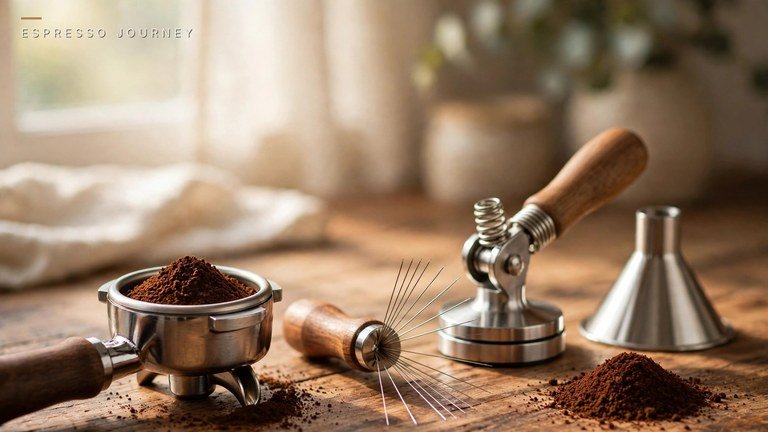
The fix: distribute before you tamp — stir the grounds with a WDT needle tool (or a needle, or a thin chopstick) to break clumps and level the bed — then tamp straight down, level, the same way every time.
6. Judging the shot by its crema
A thick crema looks like success, so beginners grade their shots by it. Crema cannot carry that weight. At most, it hints at how fresh the beans are; it says surprisingly little about how the shot extracted, and plenty of handsome shots taste sour and thin while plenty of thin-crema shots taste sweet and balanced. On a pressurized (dual-wall) basket it says even less: the basket’s pinhole whips almost any coffee — stale, coarse, whatever you feed it — into a crema-like foam. Grading that shot by its foam is grading the basket, not the coffee.
How you’d notice: thick foam on a sour, watery shot gets declared a win because it looked right — or a balanced shot gets poured away because its crema was thin.
The fix: taste is the judge; crema is, at best, a freshness hint. The dial-in guide’s pressurized-basket section explains what that basket can and cannot tell you.
7. Chasing 25–30 seconds instead of taste
The famous window is a starting diagnostic, not a finish line — and not even a single window: published guides quote ranges from 20–30 up to 25–35 seconds. The numbers around it are practice, too: the 1:2 ratio is a consensus starting point that shifts with the roast (light roasts are commonly pulled longer, around 1:2.5–1:3, as expert practice). Treat 36 grams in 28 seconds as pass/fail and you keep shots that taste wrong because the clock approved them, and adjust away shots that tasted right because it did not.
How you’d notice: an in-window shot that is clearly sour or bitter gets drunk anyway; a delicious 34-second shot gets micro-adjusted back toward mediocrity.
The fix: let time tell you what the grind is doing, and let taste make the final call. When a shot tastes sour or bitter, those guides walk through the specific fix — the clock alone never will.
8. Pulling the first shot on a cold machine
Brew water gives up heat to whatever it touches, and a cold group head and portafilter pull that heat out at exactly the wrong moment. The result is a cooler, under-extracted first shot — through no fault of the beans, the grind, or you. Beginners often “fix” this phantom problem by changing the grind, then chase a setting that was never wrong.
How you’d notice: the first shot of the day is sour and thin; the second shot, at identical settings, is fine. Nothing about the coffee changed — the machine’s temperature did. (Cold equipment is one of the quieter causes in our sour espresso guide.)
The fix: warm the parts the water touches. On a fast-heating machine like the Bambino class, run a blank shot — water only — through the locked-in portafilter before the first real shot; on a boiler machine, give it its proper heat soak. Note what this is not: a reason to raise the brew temperature. The Bambino class is fixed at about 93 °C, comfortably in the working band for most beans — and for light roasts, warm equipment matters more than a setpoint you do not have.
9. Never cleaning — and never descaling
Coffee oil does not leave when the shot ends. It coats the basket, portafilter and shower screen, turns rancid, and flavors every shot that follows — a stale, bitter edge no fresh bag can cure. Scale is the slower half of the same neglect: minerals from hard water crust the heating path, narrowing flow and drifting temperature until the machine weakens or stops; manuals warn that scale damage is not covered by warranty. (A full maintenance guide is planned for Learn & Fix; for now, this section is the short version.)
How you’d notice: a creeping bitter, rancid note that survives new beans and correct settings; over months, slower flow, spitting water and weaker steam.
The fix: daily, knock out the puck, rinse the basket and portafilter, and wipe the shower screen. Descale on your manual’s cycle for your water — on hard tap water roughly every one to three months, longer on filtered; your faucet sets the schedule and your manual outranks any blog. Fill the tank with cold water only, and skip distilled water, which machines are not designed for.
10. Buying the machine first and the grinder never
The budget mistake. Beginners understandably spend everything on the machine — the visible appliance — and leave nothing for the grinder, planning to “upgrade later.” Every experienced source gives the same sequencing advice: if the budget is limited, skew it toward the grinder. The reason is mechanical, not snobbery. A blade grinder does not grind so much as smash, producing dust and boulders together, and a cheap burr grinder with coarse steps leaves settings that jump from gushing to choked with nothing in between. Without real grind adjustability, dialing in is not difficult — it is impossible.
How you’d notice: one click of adjustment gushes, the next chokes, and no setting in between exists — or, on the pre-ground path, there is no setting to change at all. The machine gets blamed; it was never the bottleneck.
The fix: budget the grinder as the primary tool and buy it first or alongside the machine — an espresso-capable burr grinder before any machine upgrade. Our grinder guide has the picks and verified prices, and the machine guide shows what a complete setup actually costs, grinder included.
Give it a week
None of these ten mistakes requires talent to fix — most require a scale, a roast date, a blank shot, or the patience to change one thing at a time. Expect the first bag to be tuition: a handful of shots to land a new coffee is normal for everyone, and about a week of daily practice is the honest learning curve. After that, the routine disappears into the background — and what is left is the part you bought the machine for.
Frequently asked questions
What are the most common espresso mistakes?
The ones that ruin the most first-month shots: starting with stale or pre-ground coffee, not weighing dose and yield, and changing several variables at once. After those come filling the basket wrong, skipping puck prep, judging by crema instead of taste, chasing the clock, pulling shots on a cold machine, never cleaning, and spending the whole budget on the machine instead of the grinder.
Why does my espresso taste bad even when I follow a recipe?
Usually one of three things: the beans are old or pre-ground (mistake 1), the puck is channeling — sour and bitter in the same sip is the tell (mistake 5) — or the recipe’s numbers are being treated as a guarantee rather than a starting point (mistake 7). A recipe gets you close; dialing in the specific bag gets you the rest of the way.
Why is my espresso sour — and why is it bitter?
Sour generally means under-extracted: grind finer, or pull a little longer, before changing anything else. Bitter generally means over-extracted: the mirror-image fixes. Both have dedicated guides here — why espresso tastes sour and why it tastes bitter — and a shot that is sour and bitter at once means channeling: a puck-prep problem, not a grind problem.
Why does my espresso have no crema?
Most often the beans: crema fades as coffee ages, so little or no crema on a single-wall basket usually means stale beans (mistake 1). The flip side is that crema is only a freshness hint, not a quality grade — a thin crema on a sweet, balanced shot is not a failure. On a pressurized basket, expect foam regardless; that basket manufactures it.
Do I really need a scale for espresso?
Yes — it is the one accessory that is not optional. Scoops vary and crema makes volume misleading, so without weighing dose in and yield out, your recipe is two guesses. A basic 0.1 g kitchen scale is enough to start.
How hard should I tamp?
There is no verified force number, whatever you may have read — the numbers quoted across guides do not agree with each other. What is verifiable is that a level tamp, repeated the same way every time, prevents channeling. Distribute evenly first, tamp straight down and level, and stop shopping for a number.
Can I just use pre-ground coffee?
You can start there — that is what the pressurized basket in your machine is for, and it is forgiving by design. Just know the ceiling: pre-ground stales quickly and its grind cannot be adjusted, so shots plateau at decent. The jump in quality comes from whole beans and an espresso-capable grinder.
What water should I put in my espresso machine?
Fill from the cold tap, not the hot one. Avoid distilled or de-mineralized water, which machines are not designed for and which makes flat-tasting shots. If your tap water is very hard, filtered water stretches the time between descaling; either way, your manual sets the schedule for your water.